If you’ve ever stepped over a bin of vinyl rolls to find your Cricut buried under six months of packaging supplies, this one’s for you. This client runs a small handmade business out of her craft room — cardmaking, custom vinyl, laser-cut gifts — and the space that was supposed to power her shop had become the room she avoided. Supplies were piled on every surface and floor, project bins never made it back to a shelf, and finding a single roll of tape meant digging through three different totes.
Here’s how we turned it around in a single day.
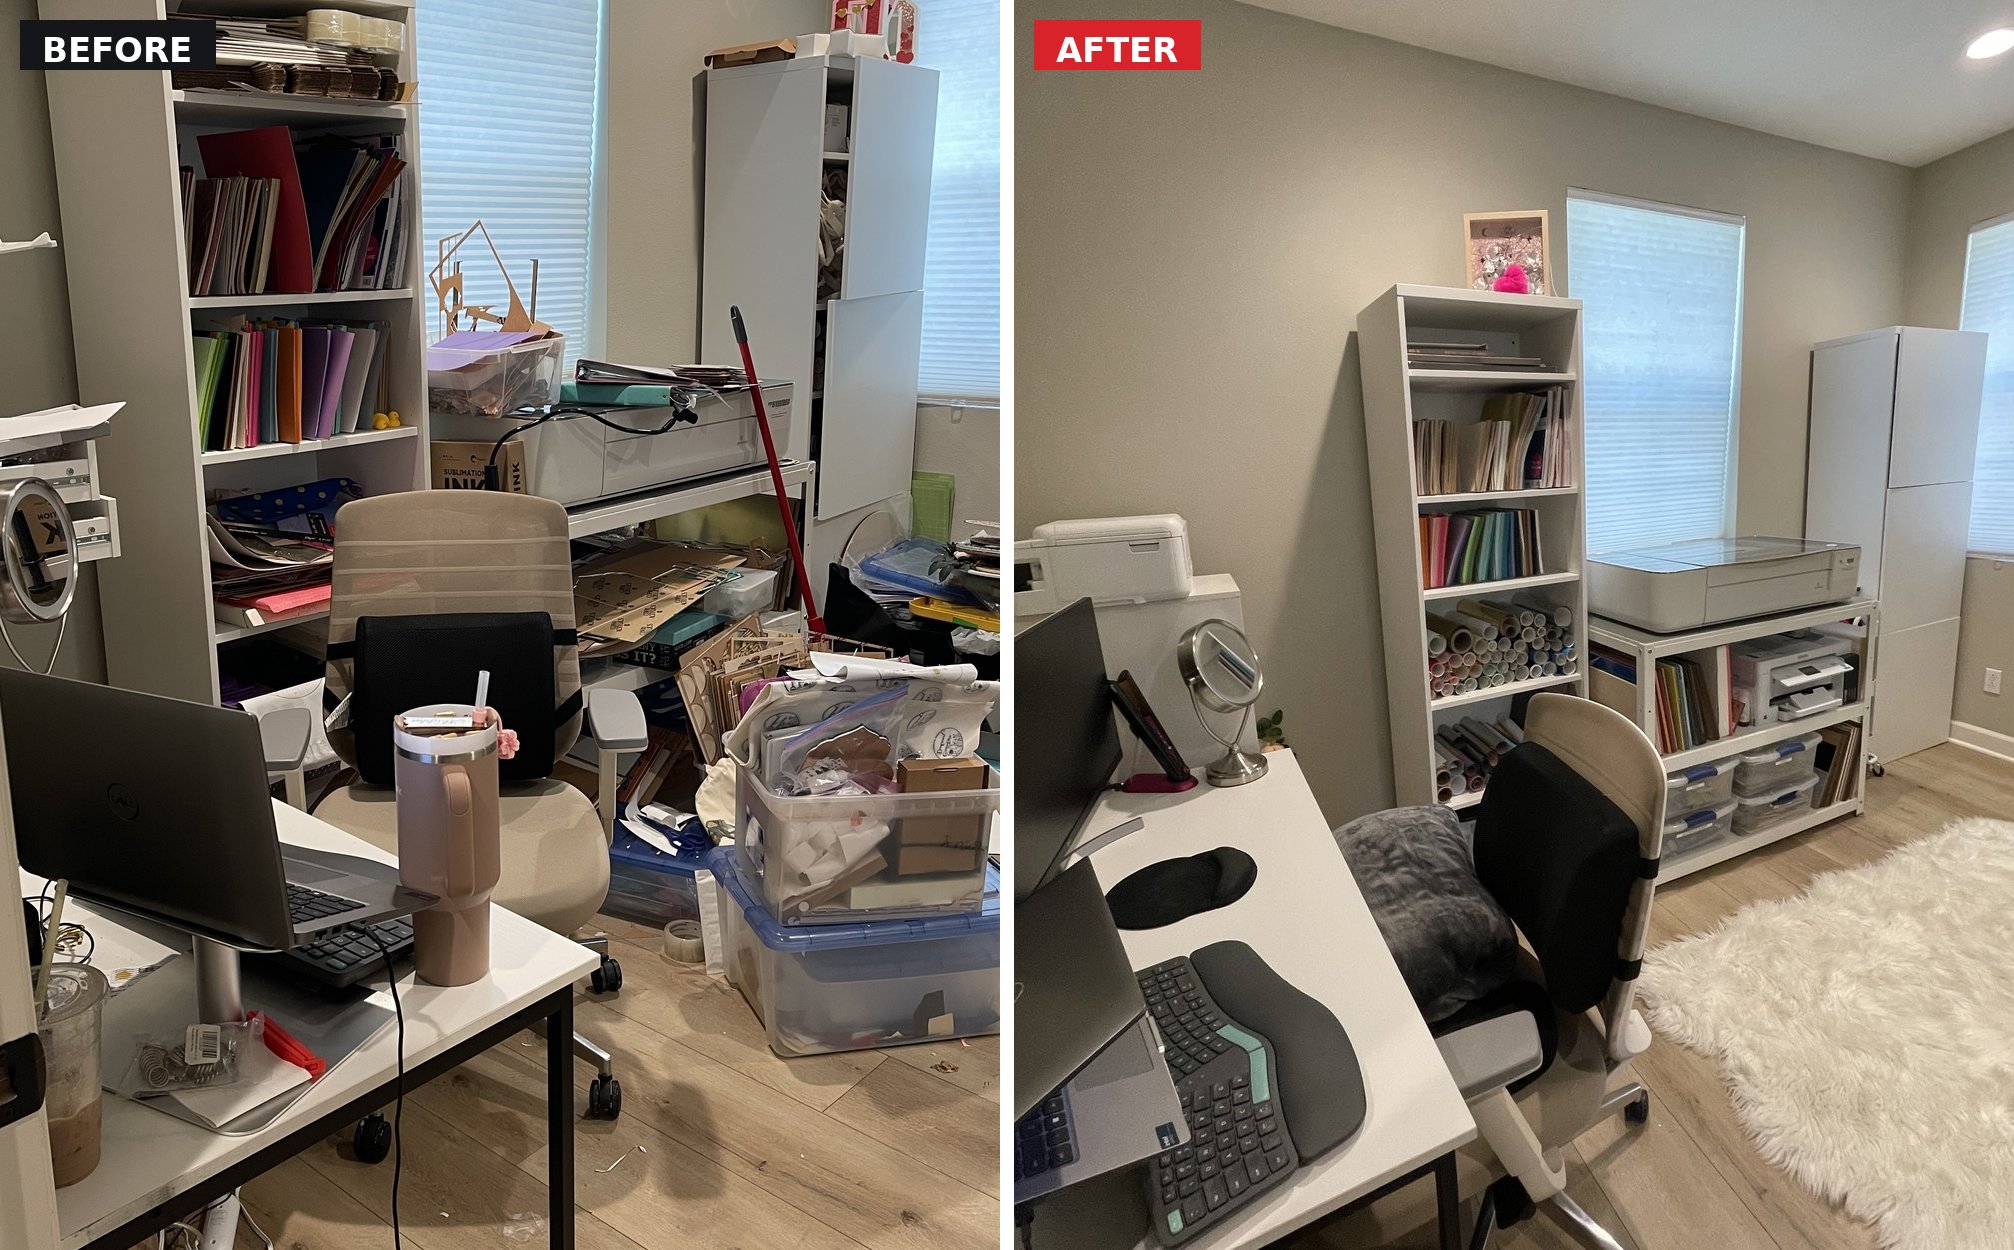
Same bookshelf, same desk — now every folder, roll, and bin has a category and a spot.
The Problem: A Business Running Out of a Cluttered Room
Craft and studio spaces get messy fast for a simple reason — supplies come in every shape imaginable. Cardstock, vinyl rolls, ribbon, packaging boxes, adhesive, shipping labels, and equipment like a Cricut and a Glowforge all need very different kinds of storage. Without a system built for that variety, everything gets shoved wherever it fits — and “wherever it fits” changes every week.
Before we touched a single bin, we walked the room with our client and asked three questions:
- What do you reach for on every order? (Cardstock, adhesive, packaging, shipping labels — the daily drivers.)
- What gets used often, but not on every project? (Seasonal vinyl colors, specialty ribbon, holiday decor supplies.)
- What hasn’t been touched in months? (Old packaging tests, duplicate tools, supplies for a product line she’d since dropped.)
That sorting alone cleared nearly a third of the room before we bought a single container.
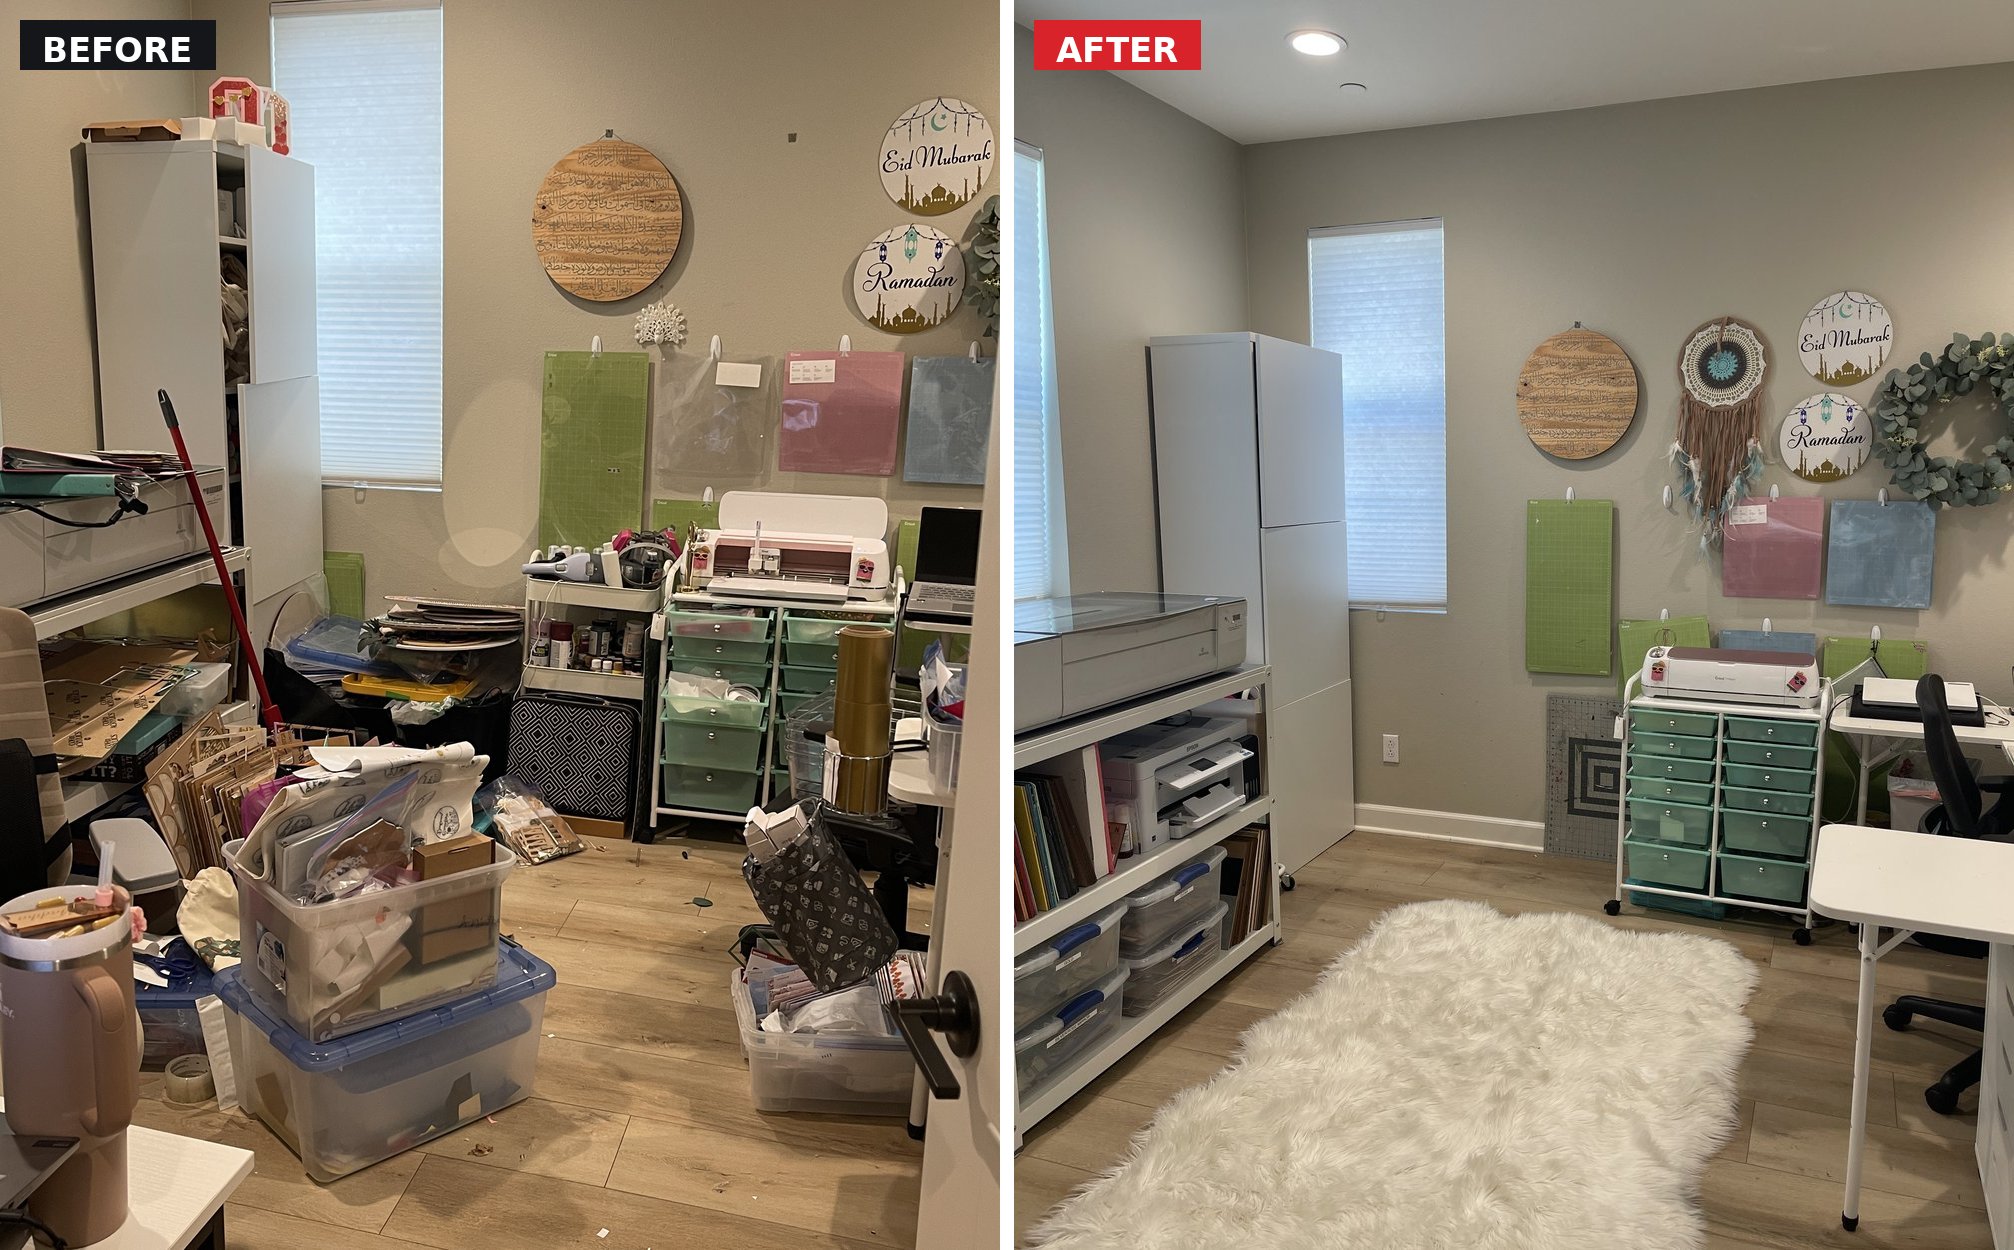
The cutting mats and Cricut cart stayed in place — we just cleared the floor around them and gave the loose totes a real home.
The Process
1. Full Empty-Out
We cleared every surface, shelf, and floor space completely — the desk, the paper storage tower, the corner workstation, and the stacks of totes that had taken over the walkway. Seeing the room empty made the real issue obvious: it wasn’t a small room, it just had no system for a workflow this active.
2. Sort Into Categories
Everything got grouped by type, not by project: cardstock and paper goods, vinyl and adhesive, ribbon and embellishments, packaging and shipping supplies, and equipment. Grouping by category — instead of by order or project — means she can find what she needs no matter what she’s making next.
3. Purge What No Longer Earns Its Space
Dried-out adhesive, duplicate scissors, and packaging for a product she no longer sells all went in the donate or recycle pile. We hauled away what wasn’t wanted the same day, so nothing sat around “to deal with later.”
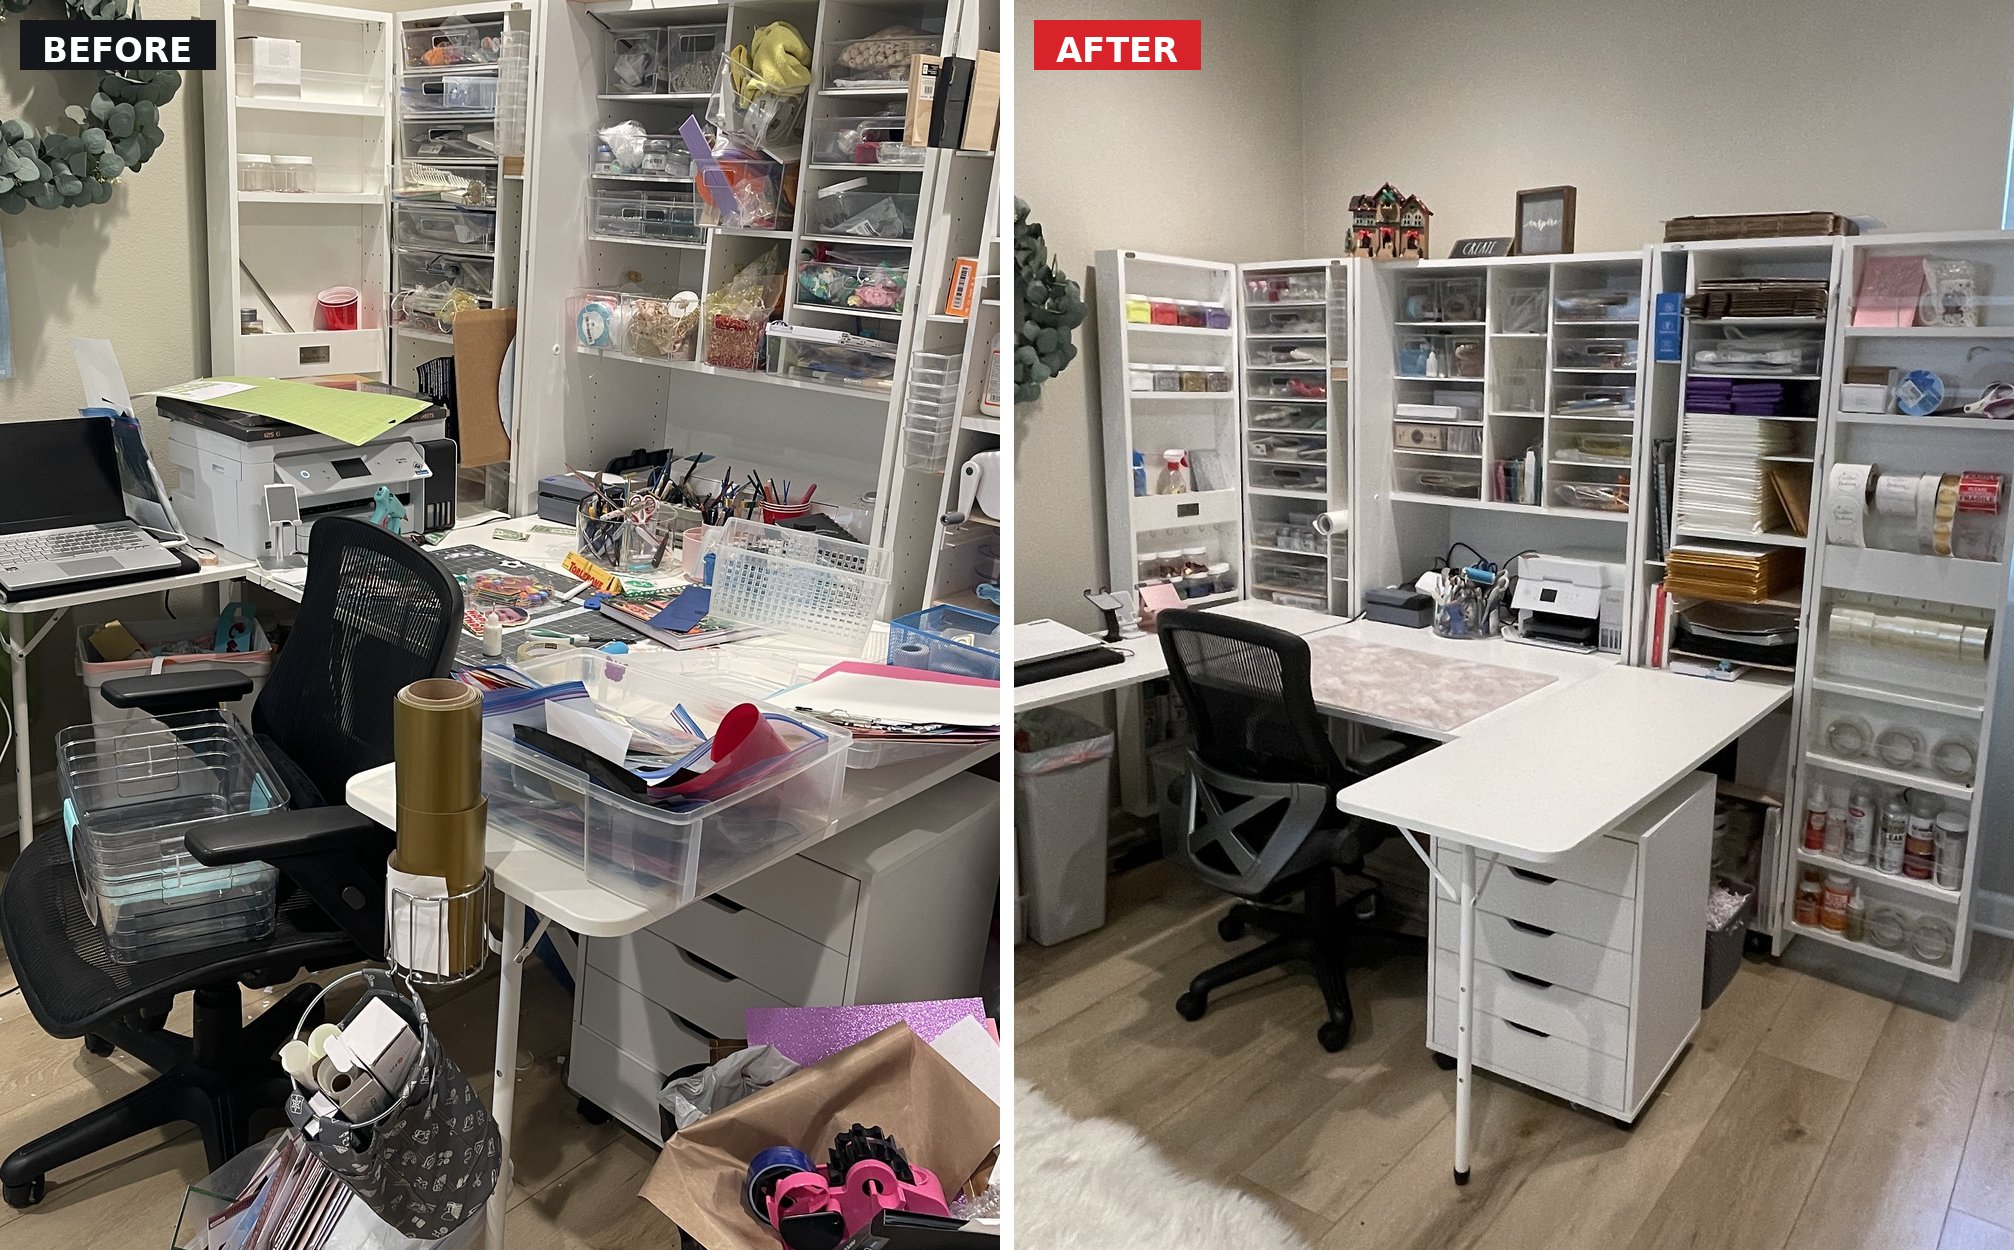
The fold-out towers already had the right bones — they just needed everything sorted into drawers by type instead of piled loose on the desk.
4. Contain and Label
This is where the room actually transformed. We matched containers to the shape of the supply instead of forcing everything into the same size bin:
- Clear labeled bins for mirror card, gold foil, and specialty cardstock, sorted by finish
- Vertical roll storage for vinyl and ribbon, so nothing gets crushed or lost at the bottom of a bin
- A drawer tower for daily-use tools and packaging basics, positioned right next to the main desk
- Dedicated shelves for shipping supplies — mailers, “Fragile” stickers, and branded labels all in one spot
- A labeled equipment shelf so the Cricut, Glowforge, and printers each have a fixed, dust-free home
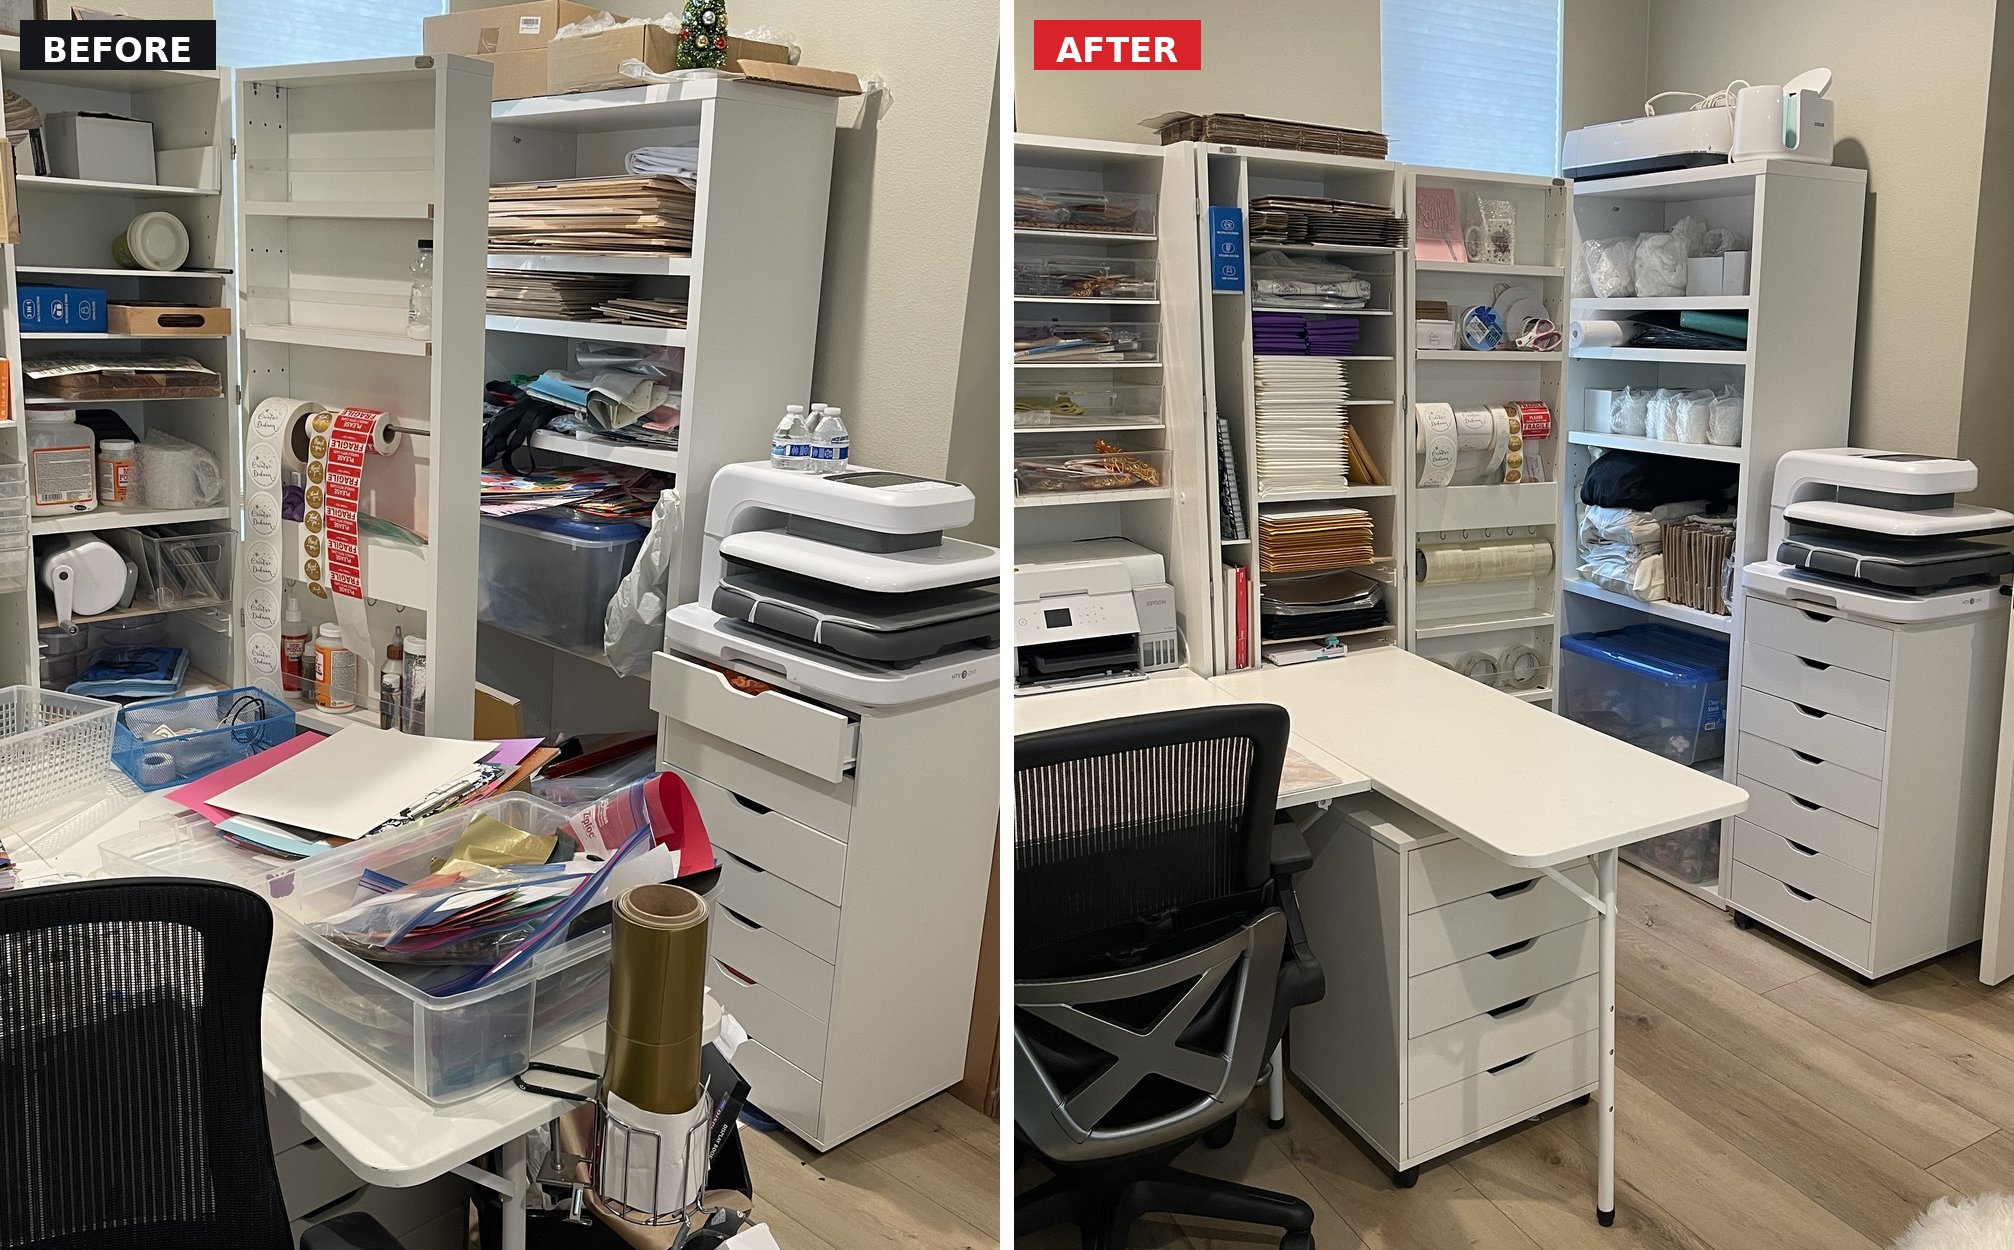
Packaging and shipping supplies — mailers, labels, wrap — now live on dedicated shelves instead of stacked boxes on the floor.
5. Reset the Layout
Last, we rearranged storage so the room flows the way she actually works — cutting and packaging supplies near the desk, paper and cardstock within reach of the workstation, equipment tucked into its own shelf out of the main walkway.
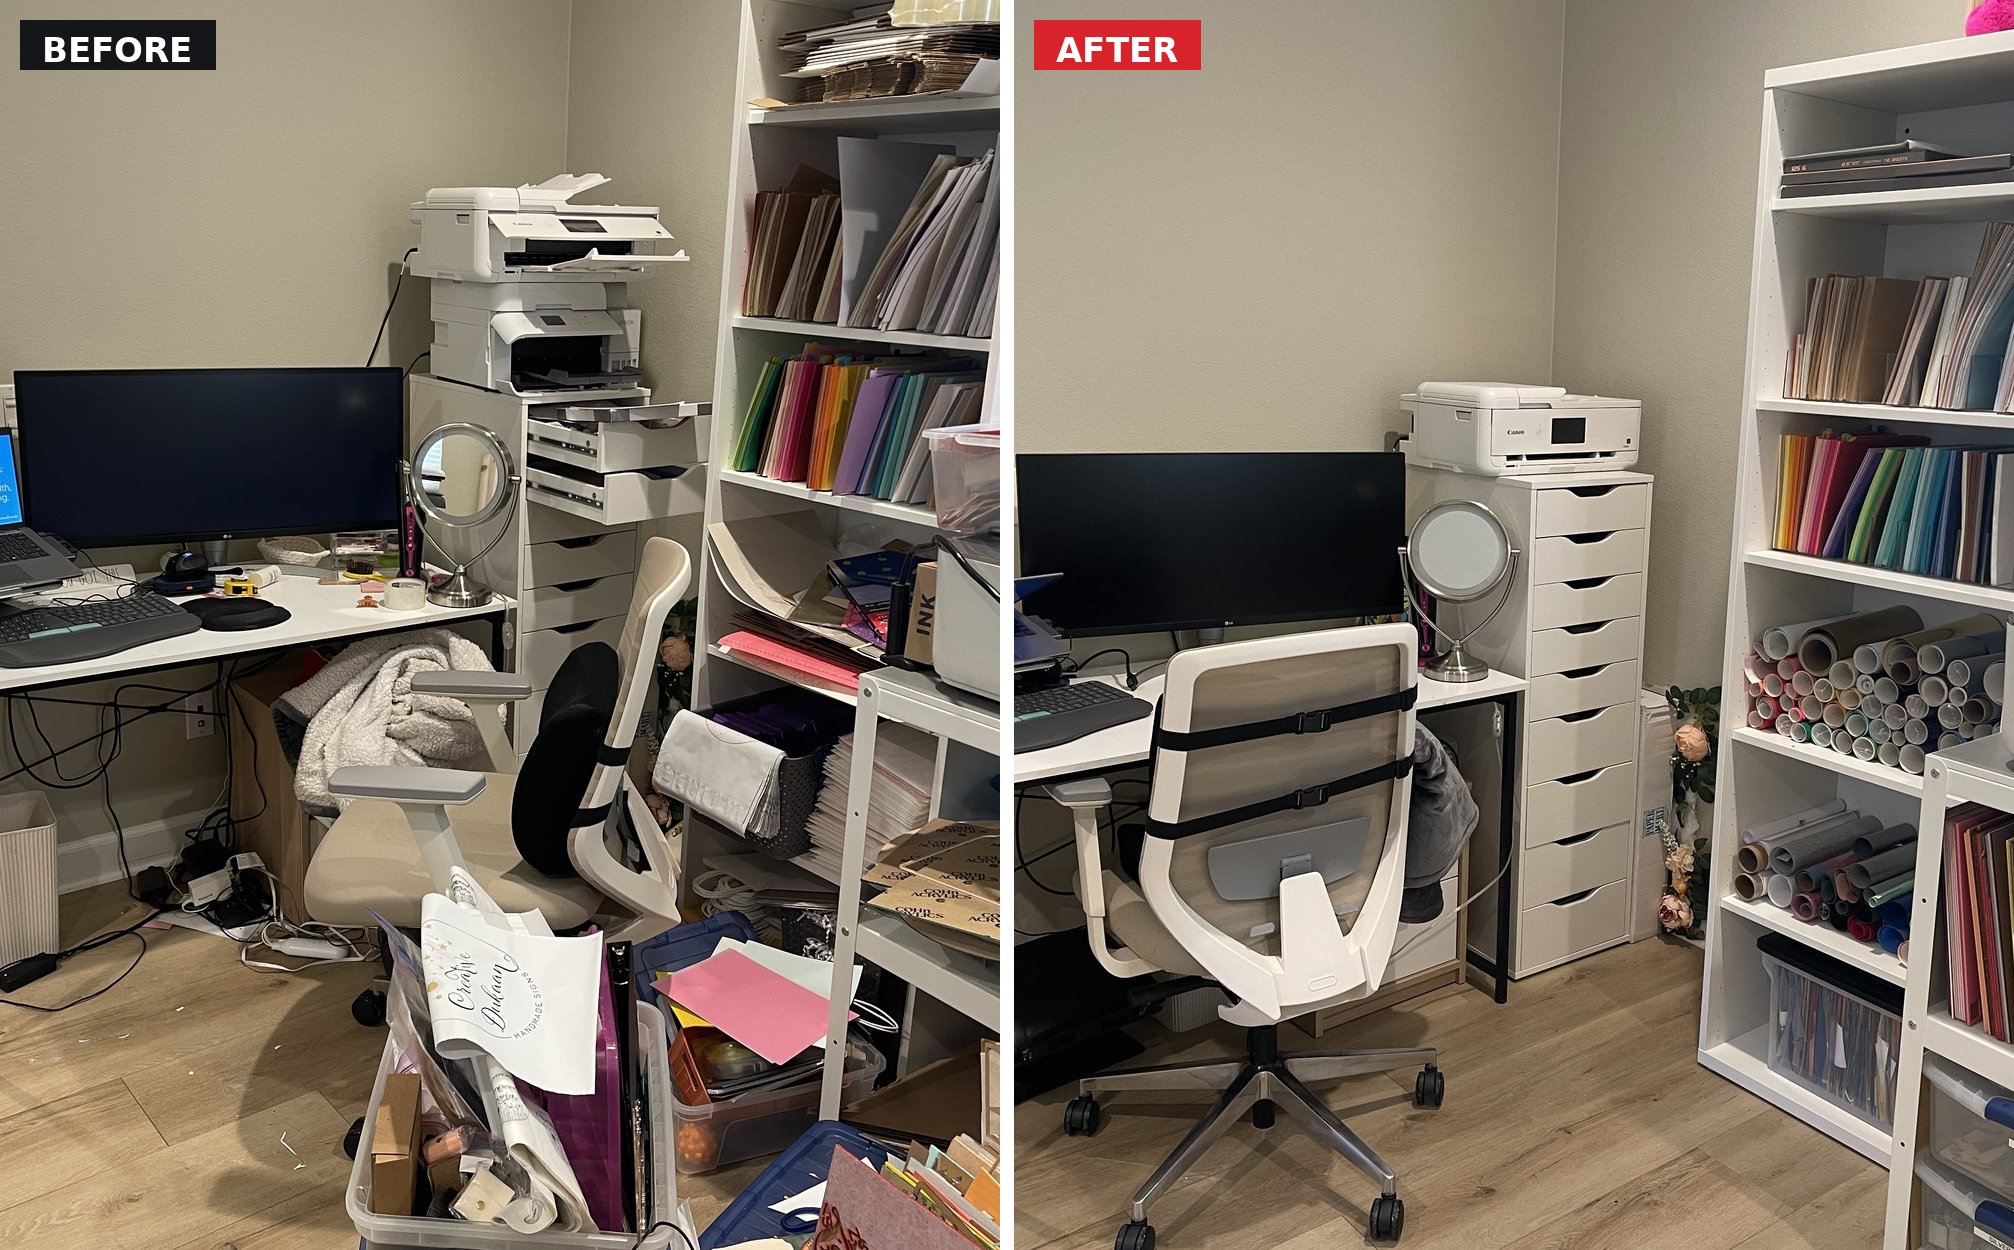
A cleared desk corner and a drawer tower that finally has room to close.
The Result
What used to take twenty minutes of digging now takes twenty seconds. More importantly, the system is simple enough to actually maintain between orders — every category has one home, and putting things away doesn’t require decision-making. That’s the real test of any organization project: not how good it looks on day one, but whether it still looks that way three months later.
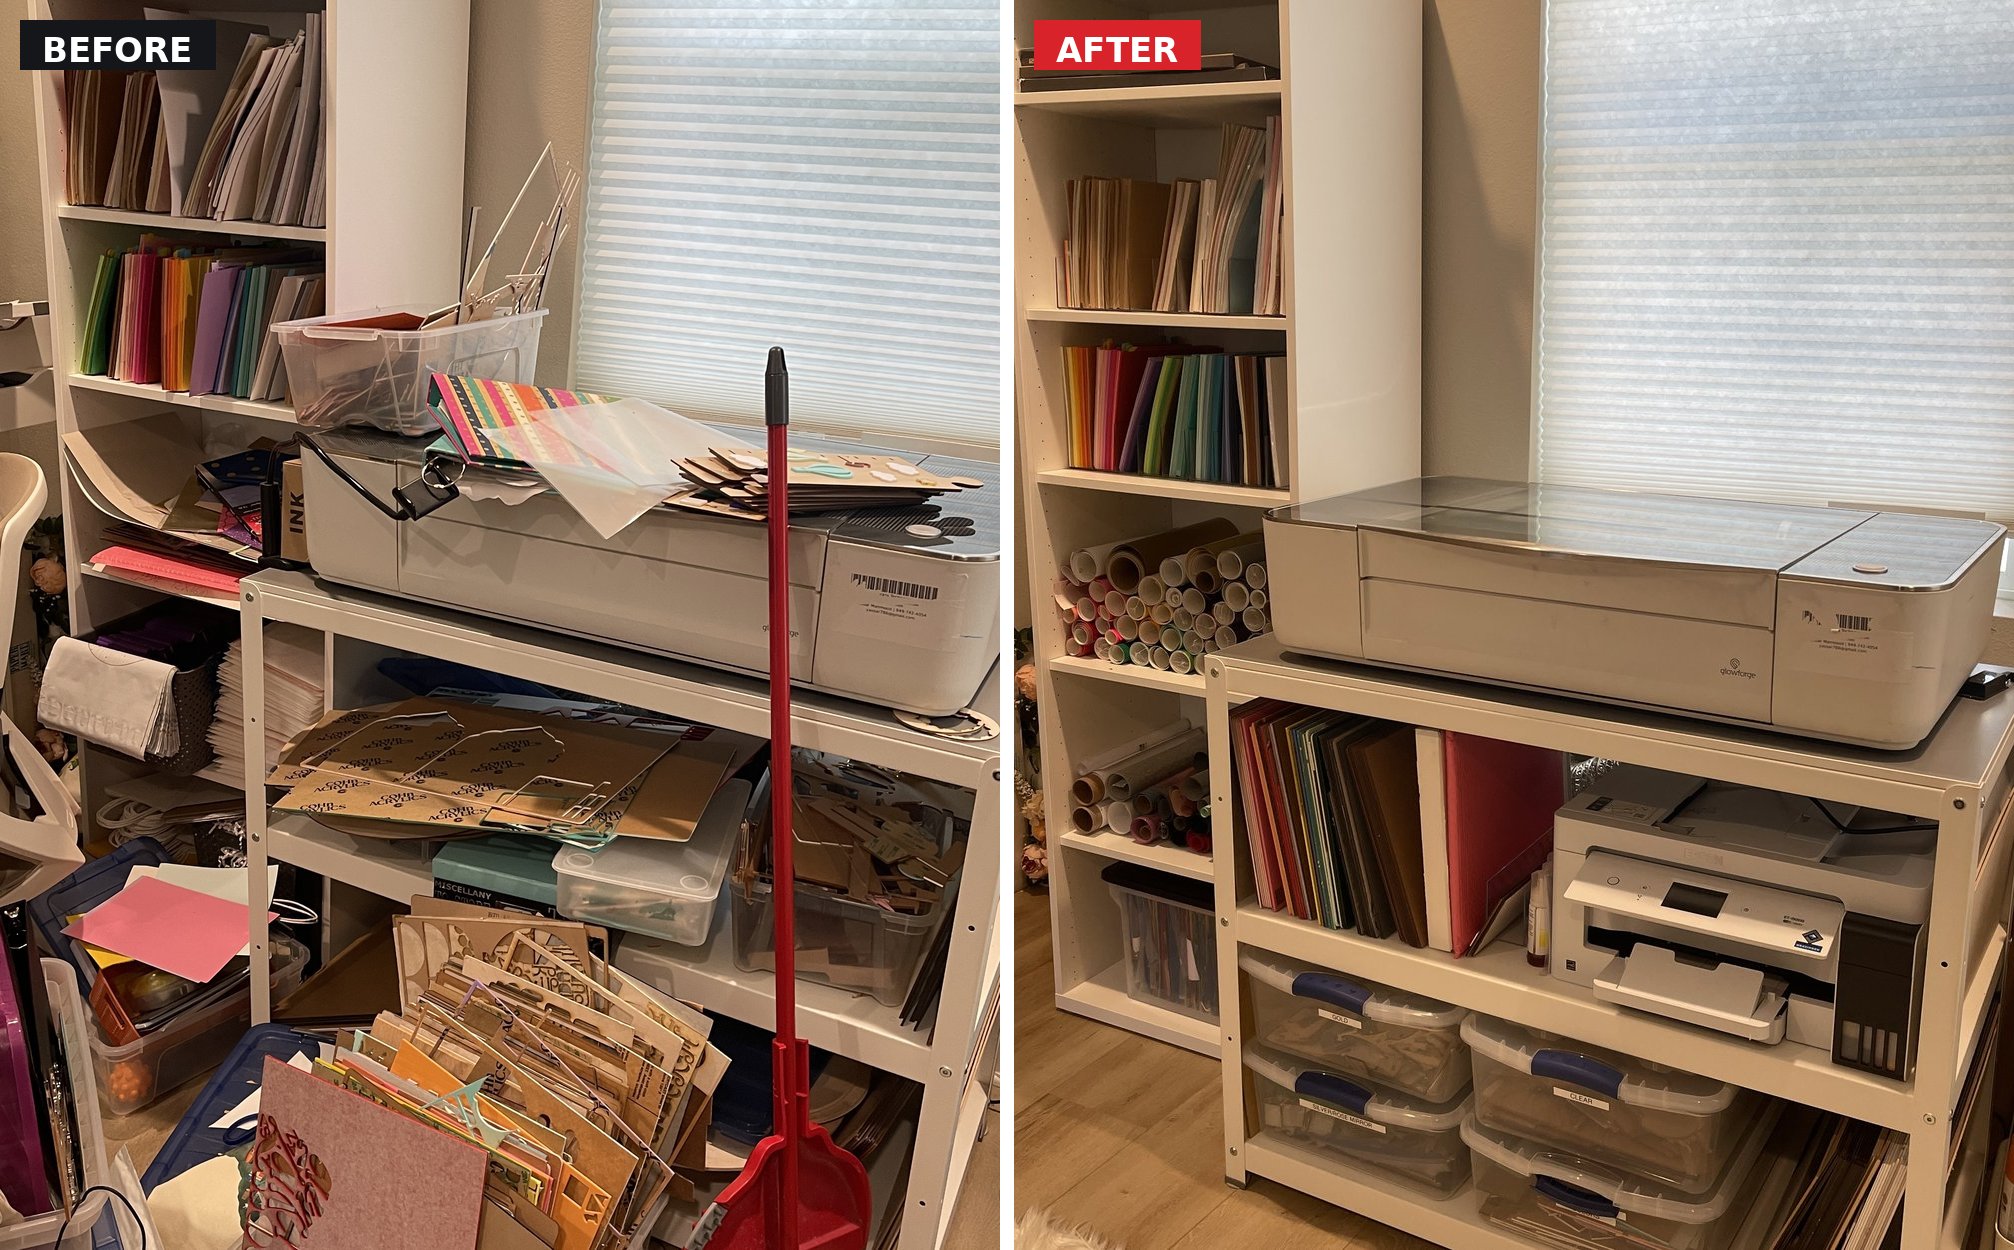
Labeled bins for foil, mirror card, and specialty finishes mean she can grab exactly what an order needs — no more digging through mixed totes.
Craft & Studio Organization Tips You Can Use Today
Even if you’re not ready for a full overhaul, a few small changes go a long way:
- Sort by category, not by project. It’s easier to find “all my vinyl” than to remember which bin has a specific order’s leftovers.
- Match containers to supply shape. Rolls need vertical storage, not a bin they’ll get crushed in — buy storage after you know what you’re storing, not before.
- Give packaging and shipping supplies their own shelf. Keeping them separate from craft supplies means you’re never digging through mailers to find your adhesive.
- Purge before you organize. Buying more bins for supplies you don’t use just means a tidier version of the same clutter.
- Label everything. Labels aren’t just for looks — they’re what makes a system last past the first week, especially when you’re moving fast between orders.
Ready for Your Own Before & After?
Whether it’s a craft room, a home office, or a garage that’s taken on a life of its own, we build organization systems that actually hold up — and we’ll haul away everything you don’t want to keep, same day if needed.
Get a Free Quote | Call (951) 777-0342
Serving Riverside & Orange County, 7 days a week.